NinjaTrader 8 How to add parameters - Complete Guide
In this article, we are going to create a NinjaTrader 8 indicator to see the different parameters that we can add to it.

In this article, we are going to create a NinjaTrader 8 indicator to see the different parameters that we can add to it.
- First, we are going to use the wizard to create these parameters.
- Later we are going to see the generated code, to understand it better, and make some changes.
- Lastly, we are going to add a drop-down list parameter (similar to the one used to select the brush).
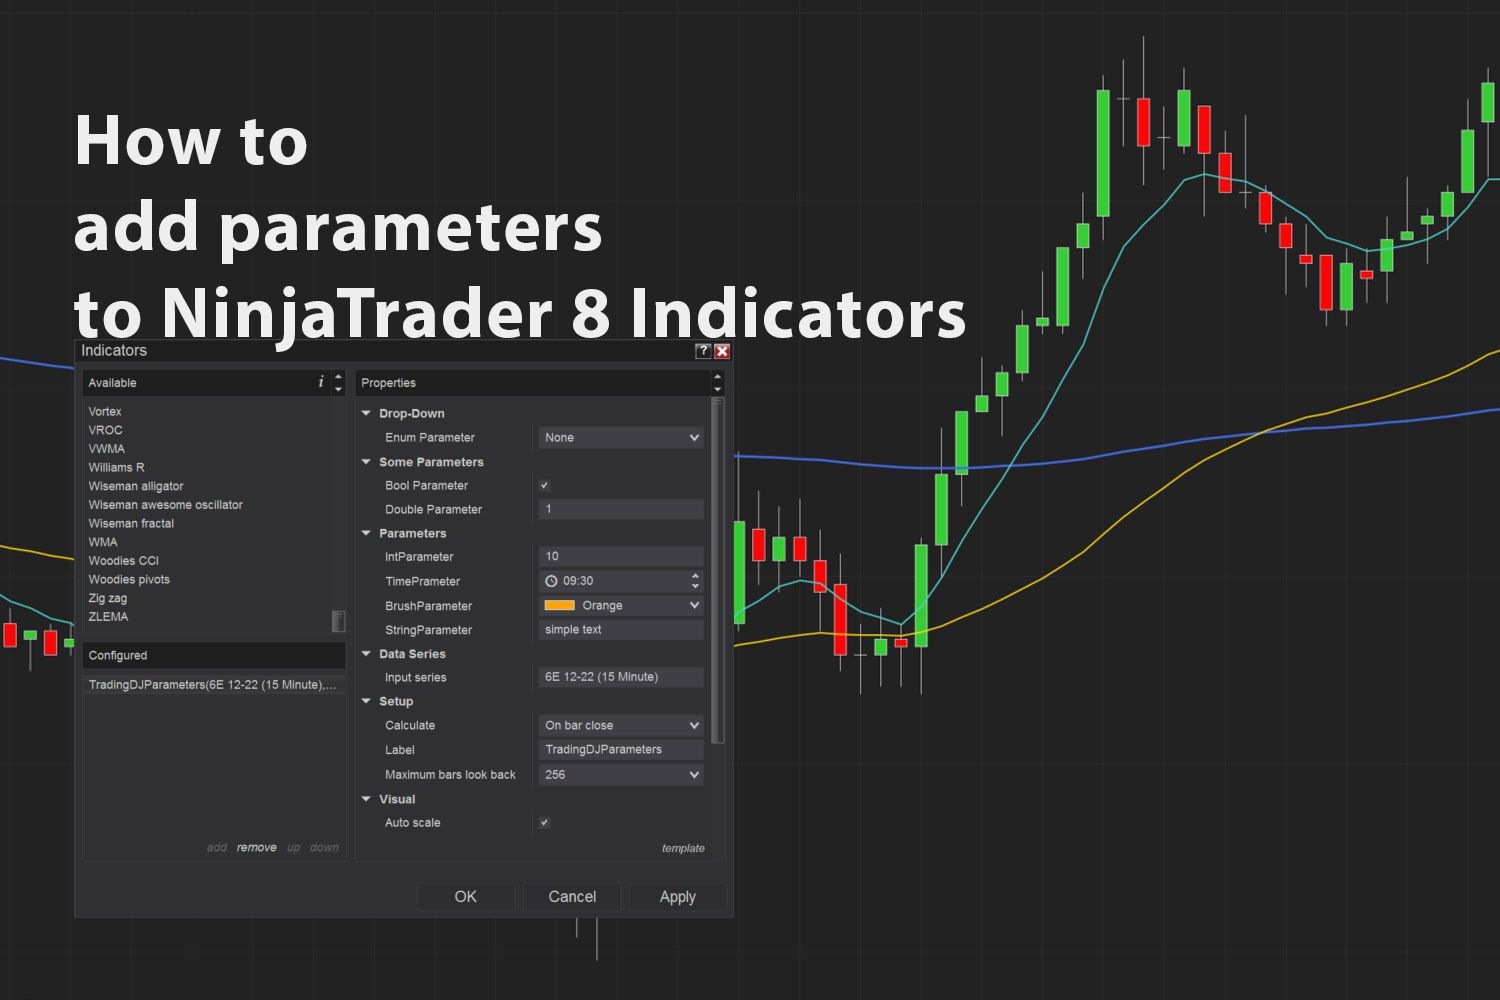
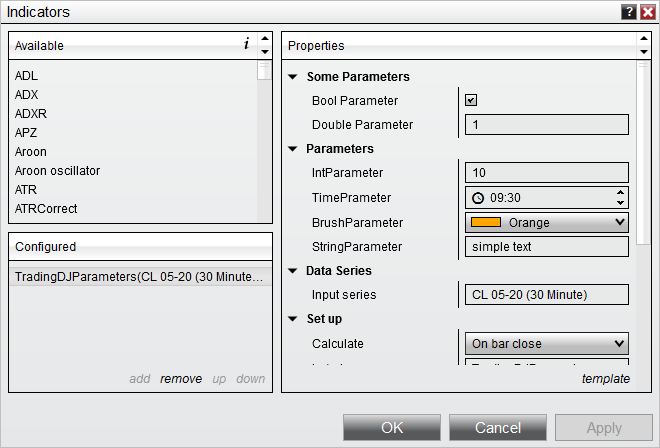
Here is the final result we will get.
Creating the indicator using the Wizard
First, we need to open the NinjaScript Editor (New -> NinjaScript Editor).
Then right-click the Indicators on the Indicators folder in the NinjaScript Editor and choose New Indicator.
Using the New Indicator Wizard, we will enter the values as follows:
General Page:
Name TradingDJParameters
Description A demonstration of NinjaTrader 8 indicator parameters.
Default Properties Page:
Calculate: On bar close
Overlay on price: Checked
More properties: Uncheck all checkboxes
Additional Data Page:
Leave all empty
Additional Event Methods Page:
Leave all checkboxes unchecked
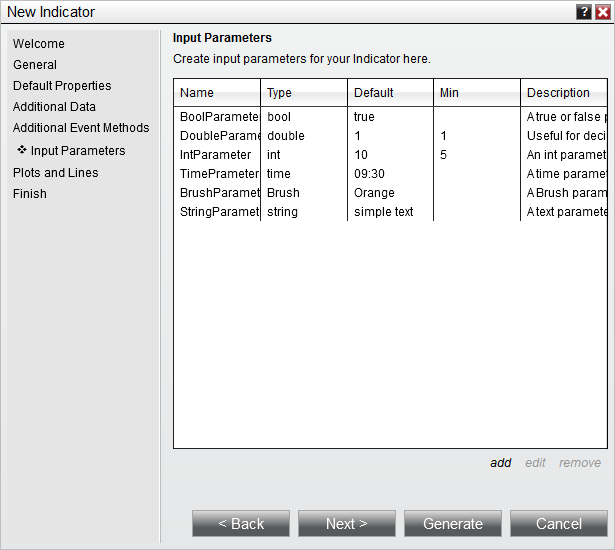
Input Parameters Page:
Let's add six parameters (one for every type).
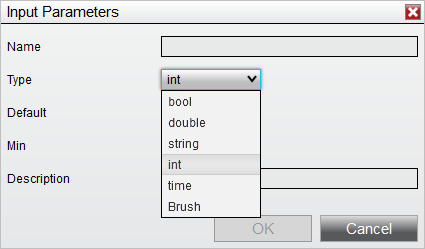
- Click add to add a new parameter with the following details.
Name BoolParameter
Type bool
Default true
Description A true or false parameter, useful for enabling and disabling functionalities. - Click add to add a new parameter with the following details.
Name DoubleParameter
Type double
Default 1.00
Min 1.00
Description Useful for decimal parameters. For example, if you need to specify a percentage. - Click add to add a new parameter with the following details.
Name IntParameter
Type int
Default 10
Min 5
Description An int parameter with the default set to 10 and a minimum allowed value set to 5. - Click add to add a new parameter with the following details.
Name TimeParameter
Type time
Default 09:30
Description A time parameter. - Click add to add a new parameter with the following details.
Name BrushParameter
Type Brush
Default Orange
Description A Brush parameter. - Click add to add a new parameter with the following details.
Name StringParameter
Type string
Default simple text
Description A text parameter.
At this point, you should see something like this.
Plots and Lines Page:
Leave empty
Once done, click Finish to see the plain Indicator tab opened in the editor.
The generated code
In the Properties region, the wizard generated the following code. You can easily add a new parameter to the indicator you are building (no need to do it using the wizard) by copying the desired parameter's generated code.
[NinjaScriptProperty]
[Display(Name="BoolParameter", Description="A true or false parameter, useful for enabling and disabling functionalities.", Order=1, GroupName="Parameters")]
public bool BoolParameter
{ get; set; }

[NinjaScriptProperty]
[Range(1, double.MaxValue)]
[Display(Name="DoubleParameter", Description="Useful for decimal parameters. For example, if you need to specify a percentage.", Order=2, GroupName="Parameters")]
public double DoubleParameter
{ get; set; }

[NinjaScriptProperty]
[Range(5, int.MaxValue)]
[Display(Name="IntParameter", Description="An int parameter with the default set to 10 and a minimum allowed value set to 5.", Order=3, GroupName="Parameters")]
public int IntParameter
{ get; set; }

[NinjaScriptProperty]
[PropertyEditor("NinjaTrader.Gui.Tools.TimeEditorKey")]
[Display(Name="TimePrameter", Description="A time parameter. ", Order=4, GroupName="Parameters")]
public DateTime TimePrameter
{ get; set; }

[NinjaScriptProperty]
[XmlIgnore]
[Display(Name="BrushParameter", Description="A Brush parameter", Order=5, GroupName="Parameters")]
public Brush BrushParameter
{ get; set; }

[Browsable(false)]
public string BrushParameterSerializable
{
    get { return Serialize.BrushToString(BrushParameter); }
    set { BrushParameter = Serialize.StringToBrush(value); }
}

[NinjaScriptProperty]
[Display(Name="StringParameter", Description="A text parameter", Order=6, GroupName="Parameters")]
public string StringParameter
{ get; set; }
To set the defaults, the wizard generates the following code in the OnStateChange() method.
BoolParameter					= true;
DoubleParameter					= 1;
IntParameter					= 10;
TimePrameter					= DateTime.Parse("09:30", System.Globalization.CultureInfo.InvariantCulture);
BrushParameter					= Brushes.Orange;
StringParameter					= @"simple text";
Understanding the generated code
To add bool or string parameters, add the [NinjaScriptProperty] (to indicate that this is a parameter) and [Display] attributes. The Display attribute has different properties. You can change
- the Name (you can add whitespaces);
- the Description (that you see when the mouse is over the property);
- the Order (the order is not alphabetical as it was in NinjaTrader 7, so you can easily change it by changing the Order property);
- the GroupName (you can group the parameters if you have lots of them).
[Display(Name="Bool Parameter", Description="A true or false parameter, useful for enabling and disabling functionalities.", Order=1, GroupName="Some Parameters")]
I changed the name of the Bool and Double (just added a whitespace) parameter, and changed the GroupName to Some Parameters. You can see we now have a different group.
You can apply the [Range] attribute to numeric parameters to limit the allowed range of numbers. The wizard generated the attribute [Range(5, int.MaxValue)] for the IntParameter. If we want to limit the upper range to 10 (and leave the lowe range to 5), we can modify the attribute to [Range(5, 10)].
The time parameter has the [PropertyEditor] attribute. If you delete it, the parameter will present itself as a date picker.
Not serializable properties
Bool, double, string, int, DateTime (the type of the properties above) are serializable types. The type of BrushParameter is Brush, and it is not serializable. To keep the selected value after a NinjaTrader restart, we must provide a Serializable property. Fortunately, the wizard did it for us.
[Browsable(true)]
public string BrushParameterSerializable
{
    get { return Serialize.BrushToString(BrushParameter); }
    set { BrushParameter = Serialize.StringToBrush(value); }
}
[Browsable(false)] tells NinjaTrader not to show this property in the properties panel. Here is what happens if you delete this attribute (you see the serialized value of the brush).
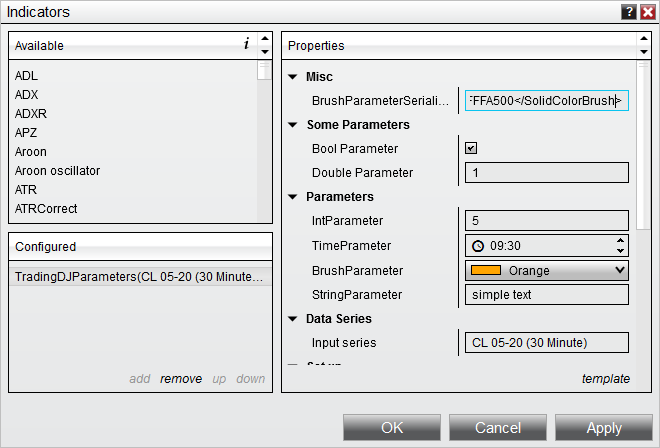
[XmlIgnore] tells NinjaTrader not to serialize (save it to XML to retrieve it later) this property when closing the application.
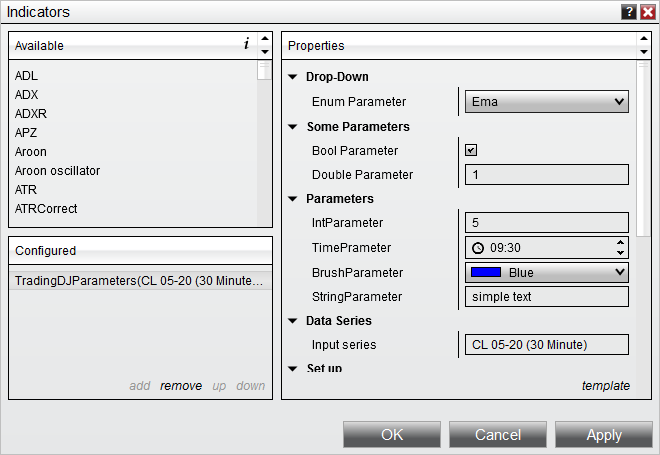
Custom drop-down list parameter
Let's start by creating the enum of the choices we want to allow in the drop-down. It must be in the global C# namespace, so in this example let's put it right after the the Using declarations region.
public enum ExampleEnumParameter
{
    Sma,
    Ema,
    None
}
Then we will create a parameter of the type ExampleEnumParameter and will decorate it with the attribute [NinjaScriptProperty] and [Display].
[NinjaScriptProperty]
[Display(Name="Enum Parameter", Description="drop-down parameter", Order=8, GroupName="Drop-Down")]
public ExampleEnumParameter EnumParameter
{ get; set; }
Let's set a default in the OnStateChange()
EnumParameter = ExampleEnumParameter.None;
The purpose of this article was to show you different kinds of parameters that you can use with NinjaTrader 8. We are not going to add any logic to this indicator. You can download this example on Github.