Getting Started with NinjaScript Editor: Creating Your First Basic Indicator
In this tutorial, we will walk through the process of opening the NinjaScript Editor and creating a basic indicator in NinjaTrader. By following these steps, you'll have a handy reference for future indicator creations, saving you time and effort. Let's dive in!

Introduction
In this tutorial, we will walk through the process of opening the NinjaScript Editor and creating a basic indicator in NinjaTrader. By following these steps, you'll have a handy reference for future indicator creations, saving you time and effort. Let's dive in!
Step 1: Opening the NinjaScript Editor
To open the NinjaScript Editor, follow these steps:
- Launch NinjaTrader.
- In the Control Center, go to the "New" menu and select "NinjaScript Editor."
Step 2: Opening the New Indicator Wizard
To create a new indicator, follow these steps:
- In the NinjaScript Editor, locate the "Indicators" folder in the "NinjaScript Explorer"
- Right-click on the "Indicators" folder and select "New Indicator" from the context menu.
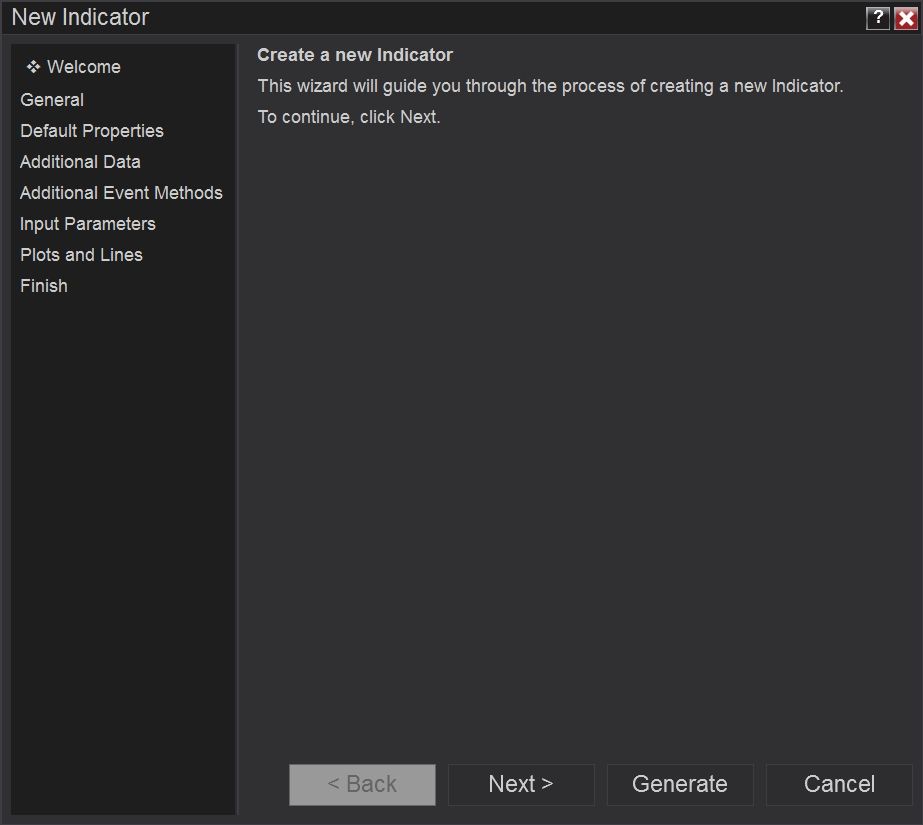
The New Indicator Wizard will guide you through the process of creating a new indicator. It consists of several categories that you can navigate through using the buttons on the bottom or by clicking on the categories on the left pane. The categories include:
- Welcome: Provides a brief introduction and overview of the New Indicator Wizard.
- General: Allows you to specify the name and description of your indicator.
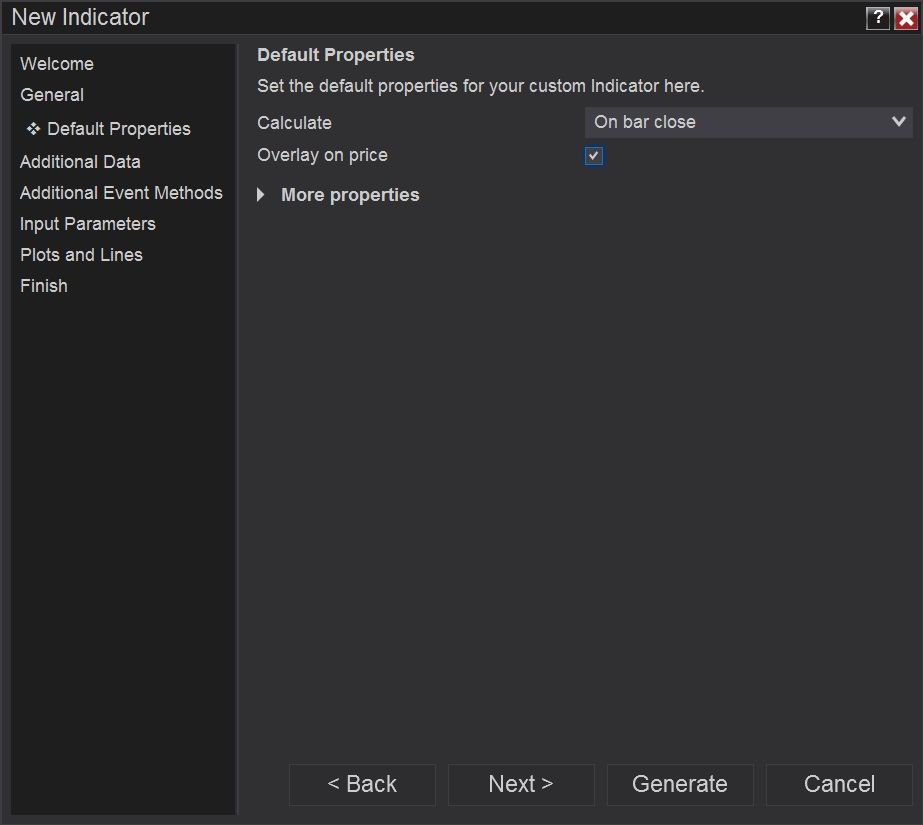
- Default Properties: Allows you to set default values for various properties of your indicator. These properties include the calculation type, overlay settings and others.
- Additional Data: Allows you to define additional data series or objects required for your indicator's calculations.
- Additional Event Methods: Allows you to add additional (to the OnBarUpdate method) event methods to your indicator's code.
- Input Parameters: Allows you to define customizable input parameters for your indicator.
- Plots and Lines: Allows you to configure the plots and lines that your indicator will display on the chart.
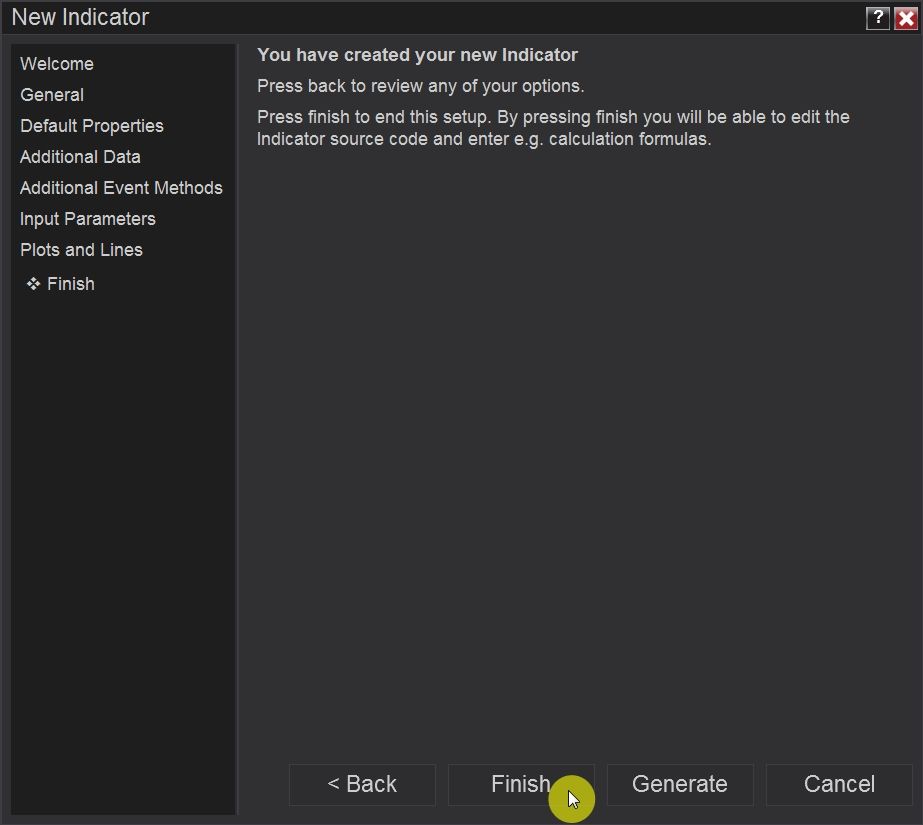
- Finish: Finalizes the creation of your new indicator and generates the initial code.
Step 3: Configuring Your Indicator
Follow these steps to configure your indicator using the New Indicator Wizard:
1. Start with the "General" category. Enter a suitable name and description for your indicator. Adding your surname as a name prefix (for example SmithEmaSmaCross) helps prevent naming conflicts when importing other indicators. In this example, we will use TradingDJEmaSmaCross
2. Move to "Default Properties" and check the checkbox "Overlay on Price"
3. Proceed to the "Input Parameters" category. Define any customizable input parameters for your indicator, such as period, colour, or any other settings you want to make adjustable.
4. Move on to the "Plots and Lines" category. Configure the plots and lines you want to display on the chart for your indicator. Specify the plot name, colour, line style, and any other relevant properties.

Step 4: Generating the Initial Code
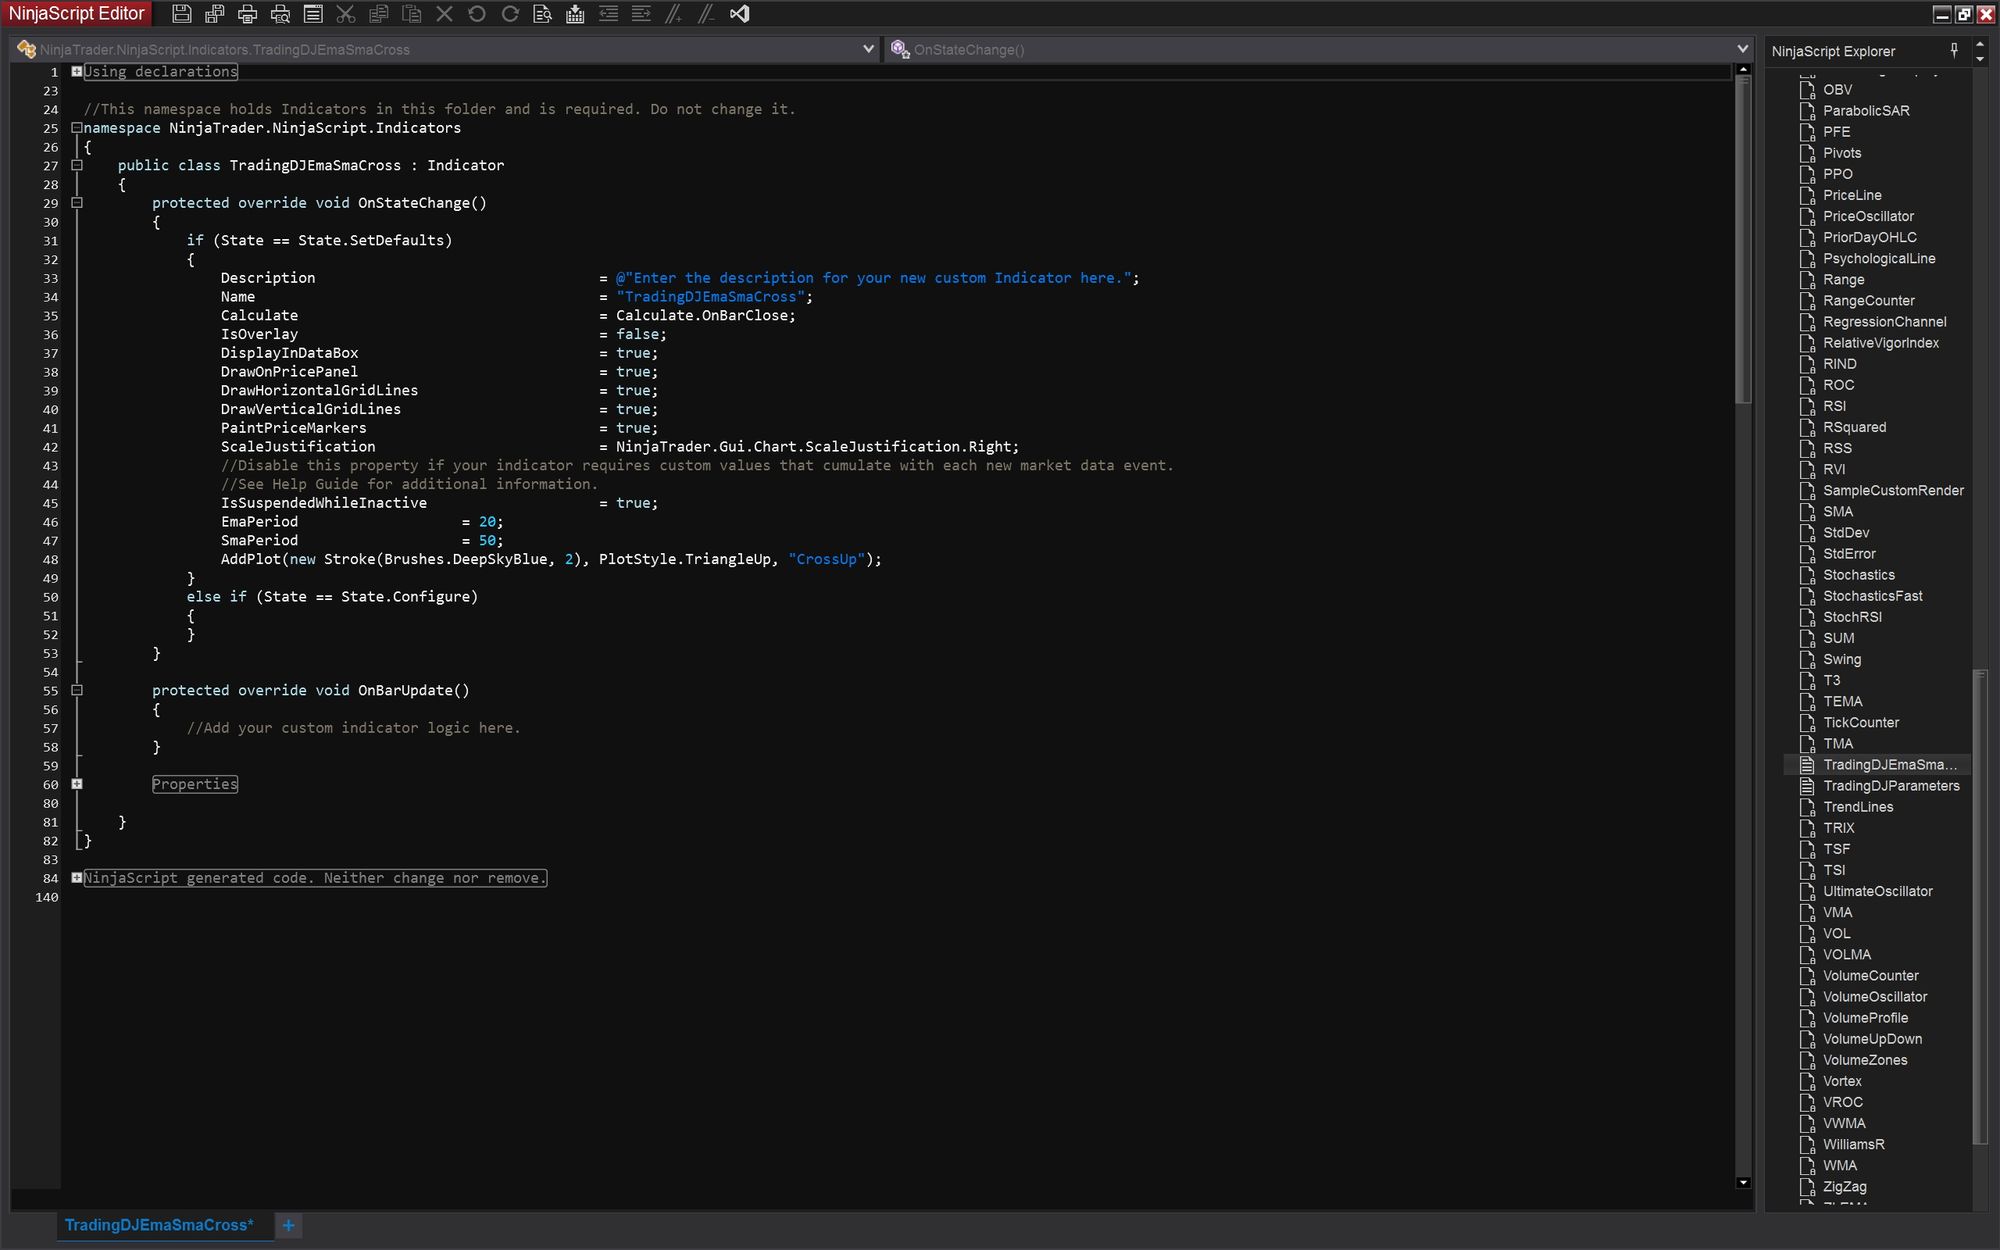
After configuring your indicator in the New Indicator Wizard, proceed to the "Finish" category to generate the initial code based on your settings. This code will serve as a starting point for your indicator's logic.
This is the code the wizard generated for you.
Step 5: Adding Functionality to the Indicator and Compiling
Now that you have created the basic structure of your indicator using the New Indicator Wizard, let's add some functionality to it by modifying the protected override void OnBarUpdate() method. In this example, we will add logic to detect a bullish crossover and mark it on the chart.
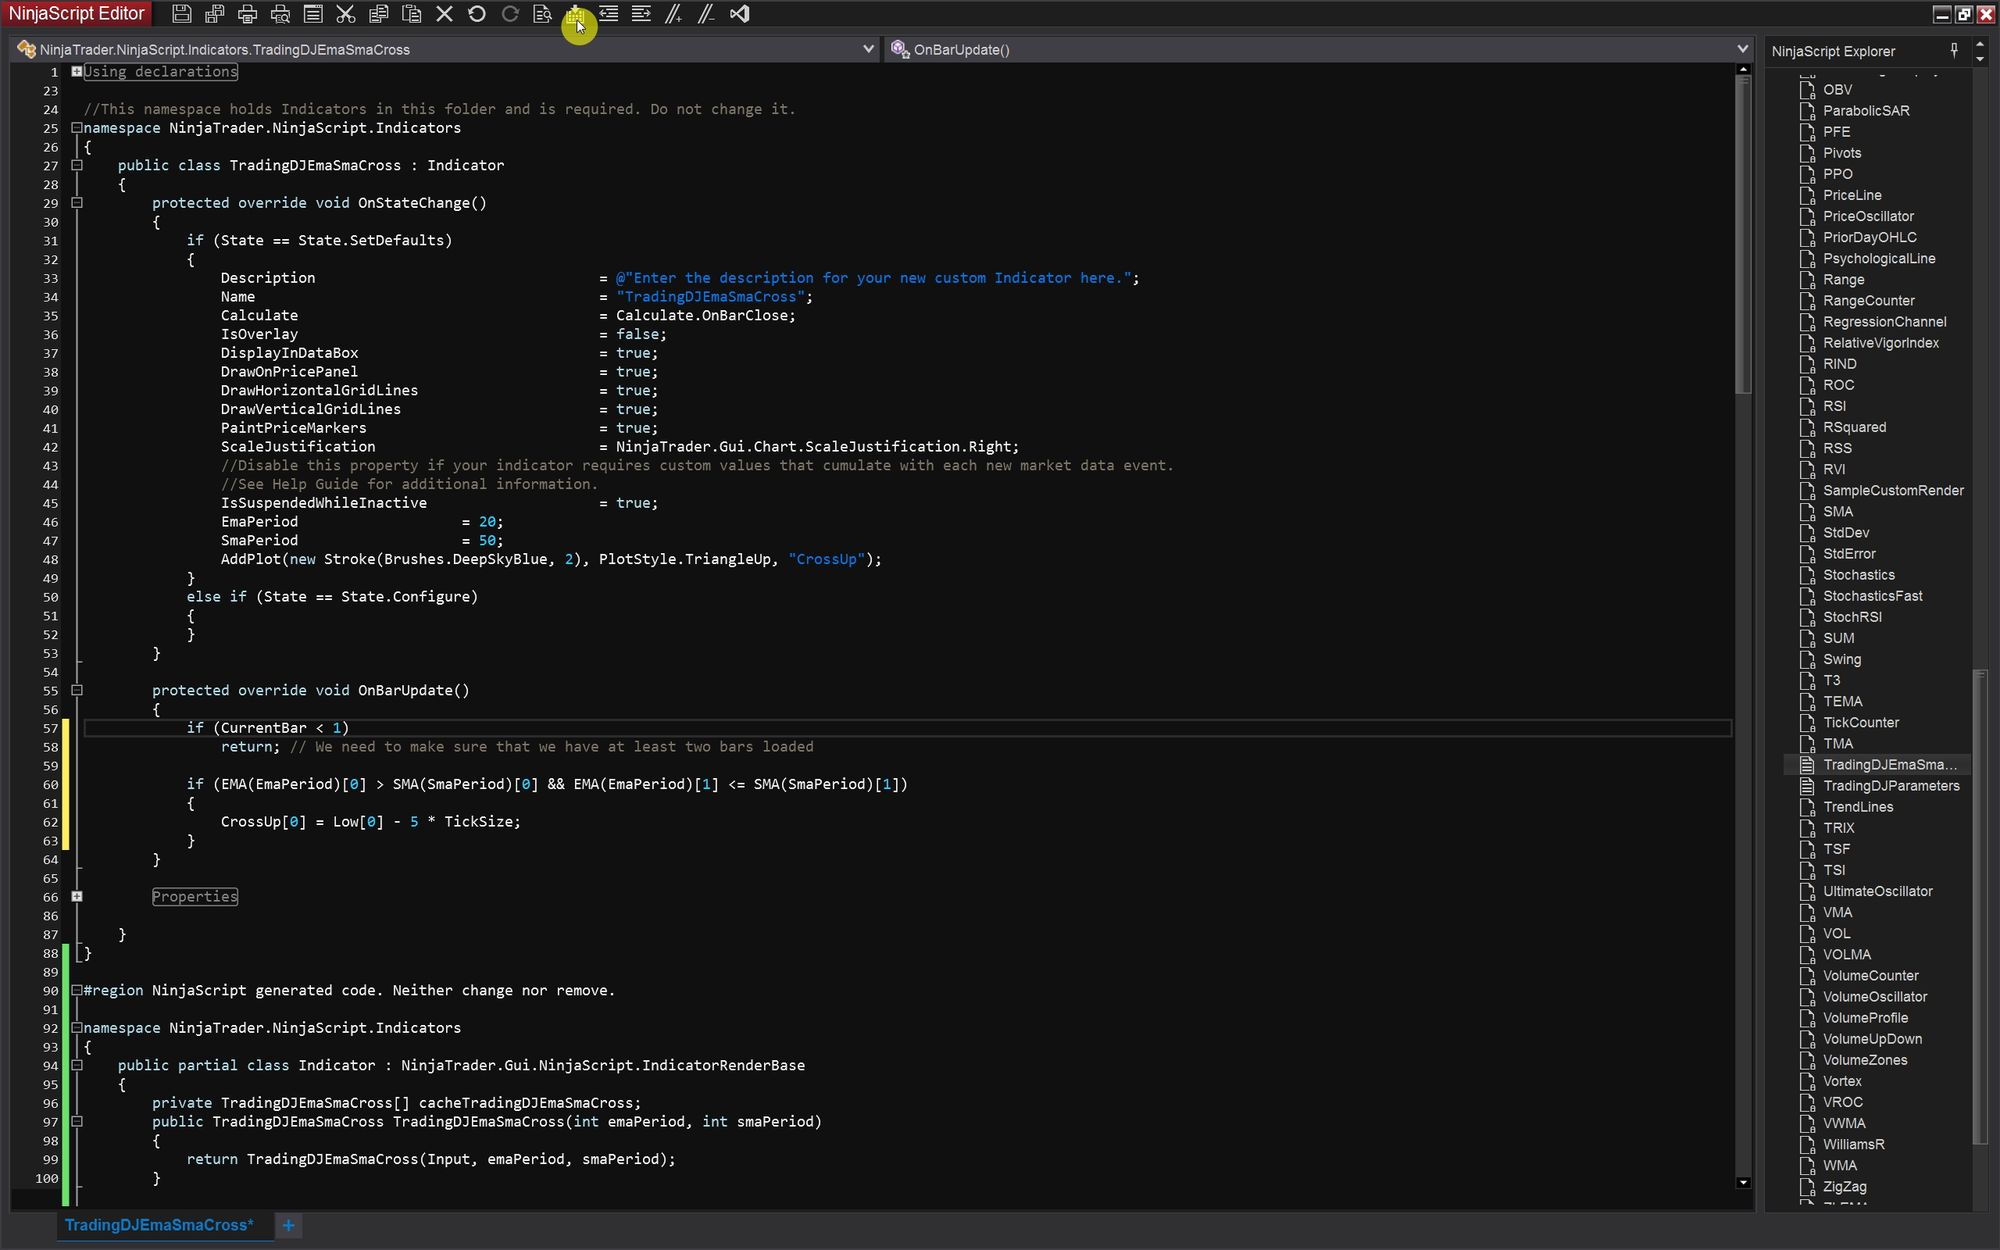
Here's the updated code for the OnBarUpdate() method:
protected override void OnBarUpdate()
{
    if (CurrentBar < 1)
        return; // We need to make sure that we have at least two bars loaded

    if (EMA(EmaPeriod)[0] > SMA(SmaPeriod)[0] && EMA(EmaPeriod)[1] <= SMA(SmaPeriod)[1])
    {
        CrossUp[0] = Low[0] - 5 * TickSize;
    }
}
In this code, we first check if CurrentBar is less than 1 to ensure that we have at least two bars loaded. This condition helps avoid errors when accessing data for calculations.
Next, we check for a bullish crossover condition using the EMA() (Exponential Moving Average) and SMA() (Simple Moving Average) functions. If the current bar's EMA value is greater than the SMA value and the previous bar's EMA value is less than or equal to the SMA value, we mark the bullish crossover by assigning a value to the CrossUp plot series. In this example, we set the value to Low[0] - 5 * TickSize, which represents a marker 5 ticks below the current low price.
Once you have added the desired functionality to your indicator, you can compile it to check for any compilation errors or warnings. To compile your indicator, follow these steps:
1. Save your modified code in the NinjaScript Editor.
2. Click on the "Compile" button located at the top of the NinjaScript Editor.
3. After compiling, review the "Output" pane at the bottom of the NinjaScript Editor for any compilation errors or warnings. Address any issues found to ensure the successful compilation of your indicator. In this case, we deliberately used a variable EmaPeriod1 that we didn't declare, to show you the error.
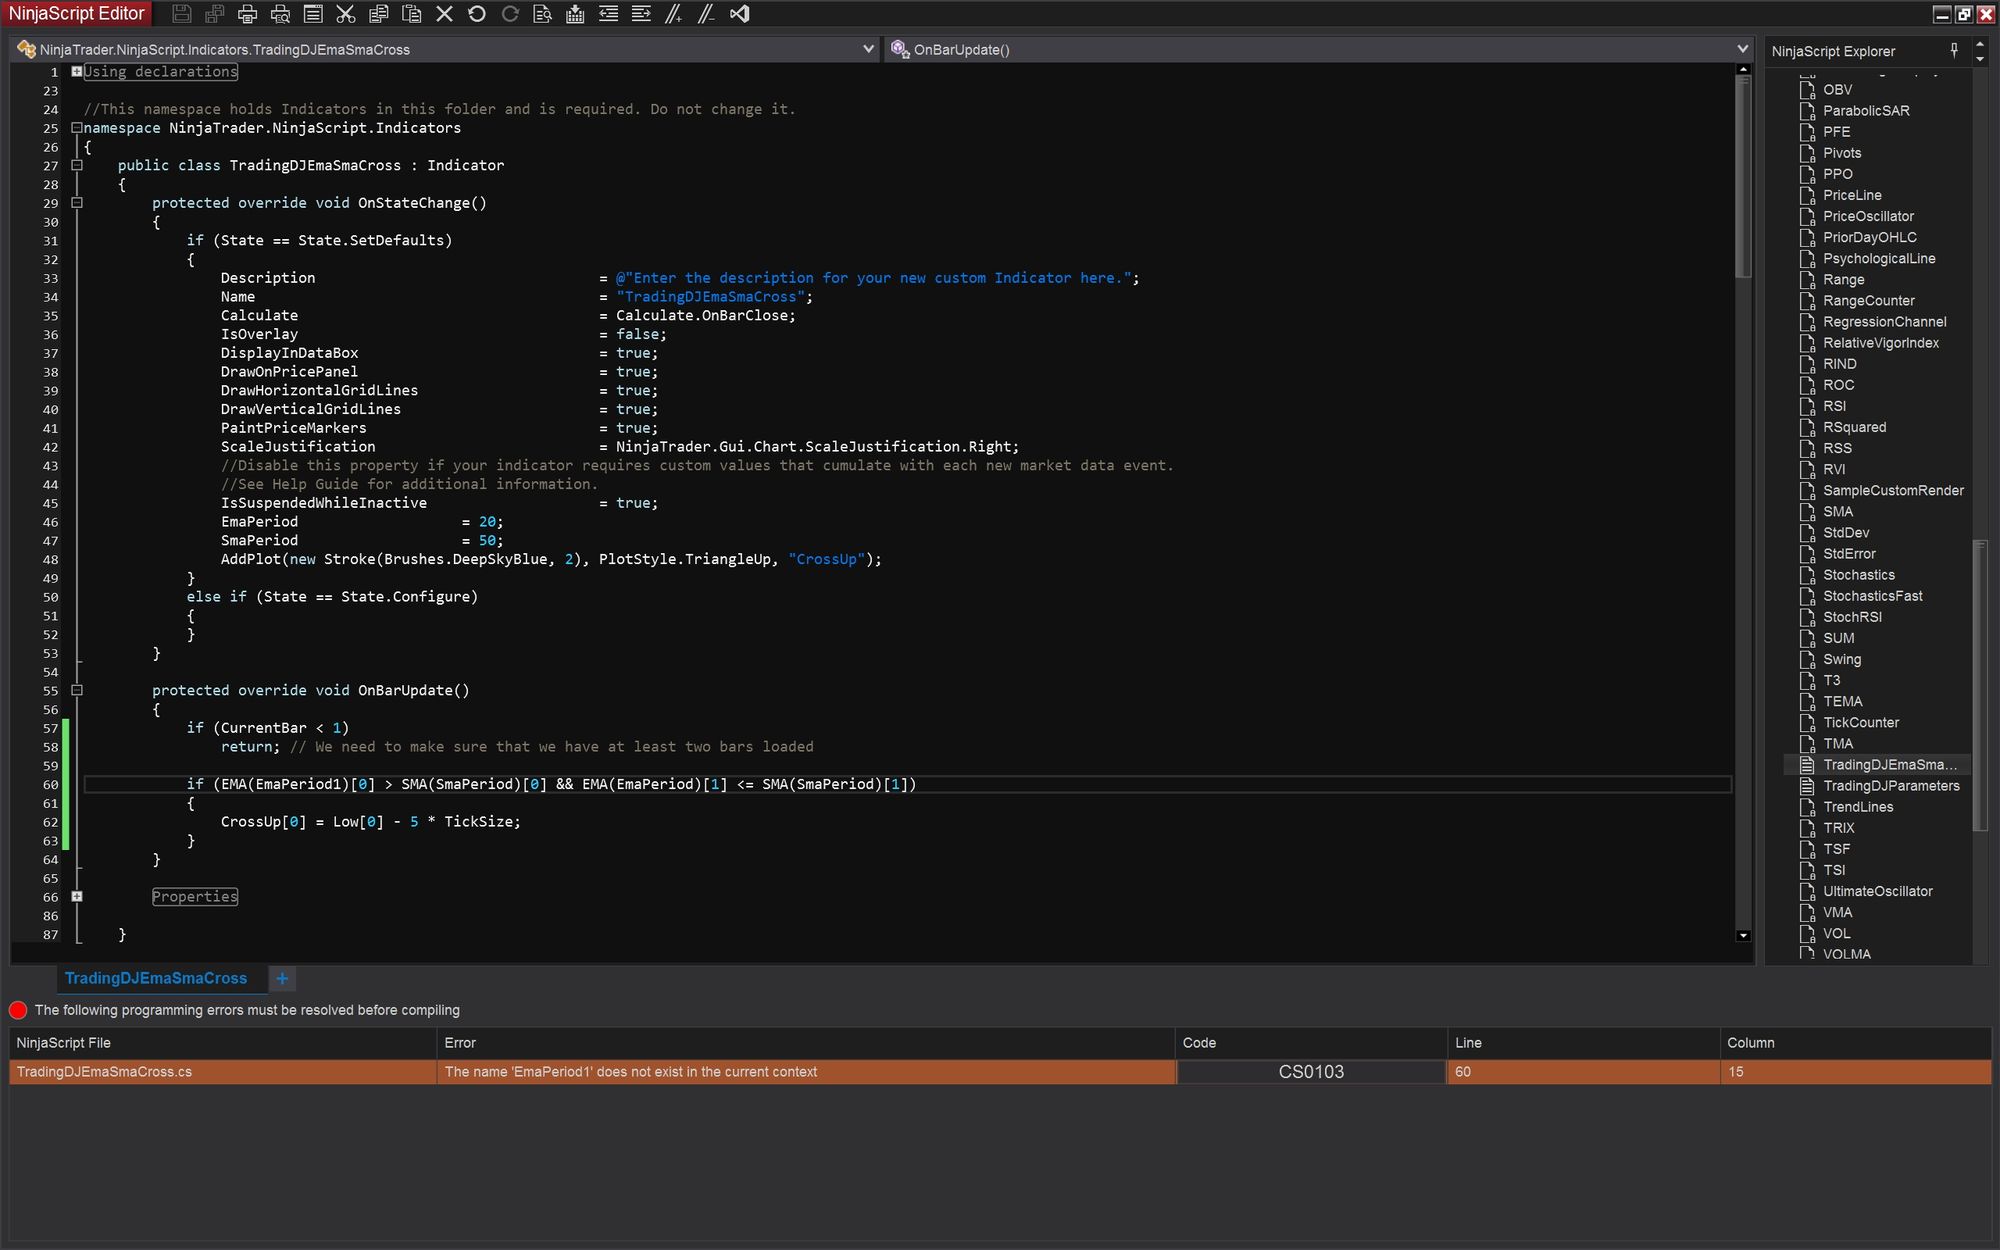
After changing it to EmaPeriod and compiling again, we are not seeing any errors and we can now use our indicator.
By adding functionality to your indicator and compiling it, you have taken the first steps toward creating a custom indicator tailored to your trading strategy. Feel free to experiment further, add additional conditions, or customize the visual representation on the chart based on your trading needs. For example, you may want to draw the arrows under the Low of the bar that causes the moving averages to cross, but under the moving average that crossed. Or you may try to write the logic for the bearish cross. Good luck!
Step 6: Expand Your Knowledge with our Dedicated Blog Series
If you are new to C# and coding for NinjaTrader 8, we highly recommend checking out our dedicated blog series on C# programming for NinjaTrader 8. This series provides in-depth tutorials and explanations to help you grasp the fundamentals of C# programming and coding for NinjaTrader 8. It serves as a perfect complement to this tutorial, providing you with additional knowledge and resources to further enhance your skills.
To access the blog series, simply click here. Whether you want to deepen your understanding of C# concepts or explore more advanced techniques, our blog series will guide you every step of the way.
By leveraging the knowledge gained from the blog series alongside this tutorial, you'll be well-equipped to create powerful and customized indicators for your trading strategies in NinjaTrader 8. Let's dive in and unlock the full potential of NinjaScript programming!